Moving a grand or baby grand piano is nothing like sliding a sofa across the room. You’re dealing with a long, unbalanced instrument that can weigh 500–1,200 pounds, with exposed legs, a delicate lyre, a complex action, and a soundboard that can crack from sudden shocks or bad angles. At the same time, most grands are among the most valuable items in a home, studio, school, or performance space – financially and emotionally.
Because of this combination of weight, fragility, and value, grand piano moving is one of the highest‑risk tasks you can attempt as a DIY project. Done wrong, it can injure movers, destroy flooring and staircases, or cause thousands of dollars in piano repairs. Done right, it requires careful planning, the right equipment, a coordinated team, and a clear understanding of when to call in specialised grand piano movers instead.
The stakes are similar to moving other high‑value, precision items – like medical imaging equipment in a clinic, industrial machinery in a factory, or a high‑end server rack in a data centre. In each case, the process is less about brute force and more about control, technique, and risk management.
This guide explains what makes grand pianos uniquely hard to move, outlines safe DIY steps for simple situations, and helps you decide when hiring professional piano movers is the safest and most cost‑effective choice.
Why Grand Pianos Are So Difficult to Move
Grand and baby grand pianos are fundamentally different from uprights when it comes to moving. That difference is what makes them challenging – even for strong, handy people who’ve moved plenty of furniture or equipment before.
Weight, Balance, and Shape
Unlike an upright, which is tall but compact, a grand piano is long and asymmetrical. Most of its weight is concentrated in the cast‑iron plate and string area, which sits off to one side of the instrument. When you tilt a grand onto its side, that weight wants to twist and roll in ways that can surprise inexperienced movers and quickly overwhelm their grip and balance.
The piano also stands on three relatively slender legs that are not designed to handle side‑loads or twisting forces. If you try to roll or pivot the piano across a room without proper technique, you can snap a leg, drop the instrument, or lose control on stairs. Even small changes in angle – such as transitioning from a flat surface to a ramp – can create stress points if the weight isn’t fully supported.
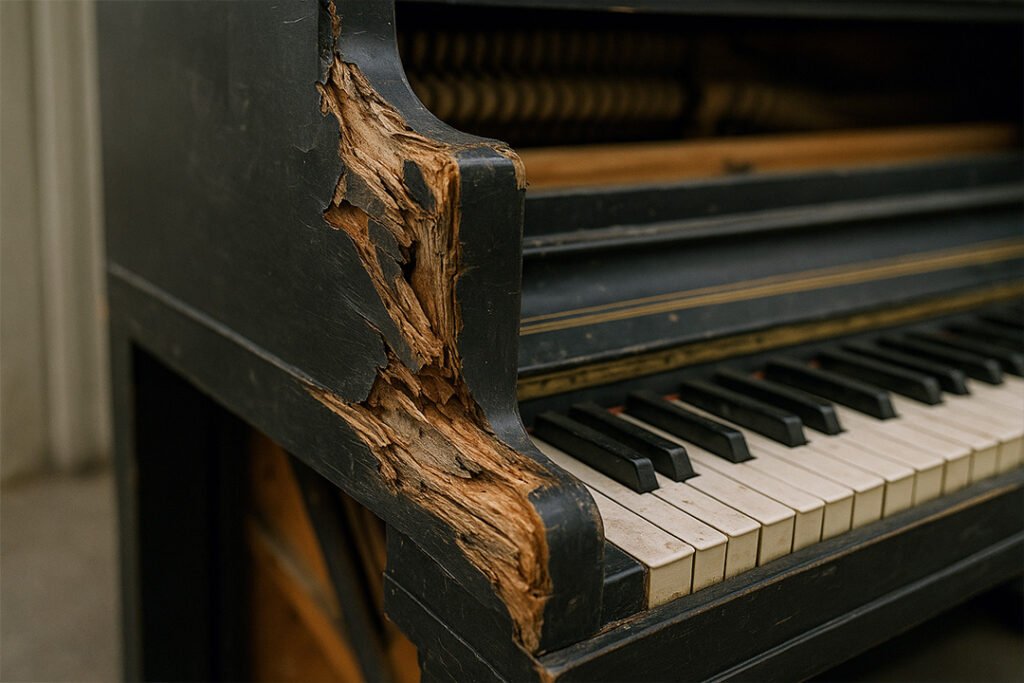
Delicate External Components
Several parts of a grand are particularly vulnerable during a move:
- The legs and casters, which can crack or buckle under sideways pressure.
- The lyre (the pedal assembly), which is exposed and can break if hit or lifted incorrectly.
- The lid and hinges, which can warp or snap if the lid is not fully secured.
- The music desk and fallboard (key cover), which can shift or slam if not locked down.
- Decorative trim and veneer, which can chip or peel if dragged along walls or floors.
All of these components need to be protected, immobilised, or removed before moving. Treat them the way you would treat fragile parts of a high‑precision instrument or lab device: if it sticks out, it’s vulnerable.
Sensitive Internal Mechanics
Inside the case, you have thousands of moving parts: hammers, dampers, action parts, and high‑tension strings pulling against a finely tuned soundboard. A sudden impact, twist, or drop can:
- Crack or split the soundboard.
- Knock the plate or bridges out of alignment.
- Break strings.
- Shift the action, leading to sticking keys and uneven touch.
- Loosen internal screws and brackets, creating buzzes and rattles that are difficult to trace.
These are not cosmetic issues; many of them are expensive to diagnose and repair, and some can permanently alter the tone and feel of the piano. As with any precision mechanical system – whether in healthcare, manufacturing, or audio engineering – shock and vibration can cause hidden damage that only shows up later, under regular use.
Real Risks of DIY Grand Piano Moving
Understanding the specific risks helps you decide how far you’re comfortable going on your own – and where it’s smarter to stop and hand the job to specialists.
Risk of Injury
Pianos are heavy, but the real danger is their awkward weight distribution. Common DIY injuries include:
- Back strains, herniated discs, and pulled muscles from improper lifting or twisting under load.
- Crushed fingers and toes if the piano shifts unexpectedly or lands on a foot.
- Falls on stairs or ramps when the load gets away from the movers.
- Shoulder and knee injuries from overexertion or trying to “save” a tipping piano.
Unlike moving a box or dresser, a grand piano can’t simply be “grabbed” and corrected if it starts tipping. Once it’s off balance, you may not be able to stop it safely – and trying to do so can make the injury worse.
Risk of Instrument Damage
Even if everyone walks away unhurt, the piano may not be so lucky. Typical DIY damage includes:
- Cracked or snapped legs from twisting while rolling or turning.
- Broken lyres or pedals from using them as lift points or bumping them against thresholds.
- Chipped or crushed case edges and rim from impacts with doorframes and railings.
- Scratches, dents, and finish damage from poorly secured blankets or exposed hardware.
- Internal damage from bad angles, sudden drops, or insufficient padding.
Many of these issues don’t show up fully until the piano is tuned or played regularly again. What seems like a minor bump could result in lingering tuning instability or a noticeable change in tone.
Risk of Property Damage
A grand piano can tear up a house on its way out (or in):
- Deep grooves, gouges, or broken boards on hardwood floors from dragging or from small casters digging in.
- Damaged stairs and bannisters from glancing blows or loss of control.
- Dented walls, damaged trim, or broken doorframes from misjudged clearances.
- Tears in carpet, damage to tile, or crushed thresholds from the concentrated load.
Insurance may or may not cover these costs if you move the piano yourself, especially if the damage is considered preventable or due to negligence. In rental properties, this can also mean disputes with landlords and potential loss of deposits.
Essential Equipment for Moving a Grand Piano
If you’re going to attempt any part of the move yourself – especially disassembly and short, flat moves – you need the right tools. Just as in construction, healthcare, or any technical field, using the proper equipment isn’t a luxury; it’s a safety requirement.
Core Piano Moving Gear
Ata minimum, a safe grand piano move requires:
- Piano board (piano skid): A specially designed, heavy‑duty wooden board with mounting points for straps, used to support the piano’s body on its side and distribute weight evenly.
- Heavy‑duty moving blankets: Thick pads to cover the entire piano body, lid, and corners to prevent dings and scratches and to cushion minor bumps.
- Piano moving straps: Strong, wide straps that can be secured around the skid and piano to hold everything tightly in place, often with ratcheting or buckle systems for fine adjustment.
- Piano moving dolly: A low, wide dolly that the piano board sits on for rolling across flat surfaces, designed to handle the full weight without flexing or bouncing.
- Non‑slip padding and tape: Rubber mats, neoprene, and high‑quality tape to prevent sliding and keep blankets in place, especially at corners and edges.
These are not optional if you want to move a grand safely, even across a single floor. Relying on standard household dollies, thin quilts, or rope is comparable to using consumer tools for industrial jobs – possible, but risky and often more expensive in the long run.
Additional Protective Materials
To protect the home or studio and keep movers safe, you should also have:
- Floor protection (ram board, plywood sheets, or thick runners) to spread the load and prevent scratches.
- Corner protectors for walls and doorframes in narrow or high‑traffic sections of the path.
- Work gloves with good grip to reduce slipping and protect hands from splinters, pinches, and metal hardware.
- Ramps for small steps, thresholds, or entryways where lifting is unsafe or impractical.
- Door stops and wedges to keep doors fully open and prevent sudden swings into the piano.
If you don’t already own this gear, renting or buying it can narrow the cost gap between DIY and hiring professionals. For one‑time or infrequent moves, many people find that the combined cost and effort make professional movers more attractive.
Safe Step‑by‑Step Disassembly
Before the piano ever leaves its original spot, it needs to be prepared correctly. Rushing this stage is one of the most common DIY mistakes, and it’s where many preventable accidents and damages begin. Think of this like pre‑operative preparation in medicine or shutdown procedures in industry: careful setup reduces risk dramatically.
1. Clear and Measure the Path
Before touching the instrument:
- Measure doorways, hallways, and stairwells.
- Compare these measurements to your piano’s length, width, and height on its side.
- Identify tight corners or problem areas in advance.
- Check ceiling heights in stairwells and low‑hanging fixtures or beams.
- Clear all furniture, rugs, and clutter along the path.
If the route doesn’t work on paper, it won’t work in reality. Adjustments made on the fly – like trying to tilt the piano more sharply to squeeze through – can lead to severe damage or injury.
2. Secure the Lid and Internal Parts
Next, stabilise the top of the piano:
- Remove any music, lamps, decor, or accessories from the piano and its immediate surroundings.
- Lock or secure the fallboard (key cover) so it can’t flap or slam.
- Close the lid fully and lock it. If there’s no lock, tape it shut using painter’s tape over a protective cloth so you don’t damage the finish.
- If the music desk is removable, either secure it in place or remove and wrap it separately.
Never move a grand with the lid open or unsecured; even a small jolt can cause it to slam shut with enough force to crack hinges, dent the case, or injure hands.
3. Remove the Lyre (Pedal Assembly)
The lyre is both fragile and in the way when tilting:
- Support the lyre from below with a helper or a temporary support.
- Locate and remove the screws or bolts that secure it to the underside of the piano.
- Carefully disconnect any rods or linkages, noting their orientation or taking photos for reference.
- Wrap the lyre in moving blankets or bubble wrap and label it clearly.
Set it aside in a safe place away from foot traffic, where it can’t be kicked, stepped on, or knocked over.
4. Pad the Case and Corners
Before the piano is tilted:
- Wrap the sides, rim, and corners of the case with thick moving blankets.
- Use tape or straps to keep blankets from slipping, especially near corners and edges.
- Pay special attention to sharp edges and corners that may contact door frames, stair rails, or walls.
- Ensure no metal buckles or hard objects on straps are directly against the finish; place padding under them if needed.
Good padding prevents a large percentage of cosmetic damage and can soften the impact of minor bumps that might otherwise chip wood or lacquer.
5. Position the Piano Board
Now it’s time to get the piano onto the skid:
- Place the piano board next to the long side of the piano, on the side it will rest on.
- Line it up with where the body will rest once the piano is on its side, ensuring full support of the rim.
- Ensure the floor under both the piano and skid is protected and non‑slip, using floor protection and rubber pads as needed.
- Check that there is enough room around the piano for helpers to stand and move safely.
This is the point where extra hands and careful communication matter most. Everyone should know where they will stand and what they will hold before the actual tilt begins.
6. Remove and Label the Legs
The legs must come off before the piano is tilted fully:
- With several helpers supporting the piano body and relieving weight from the leg, start with the leg that will be “up” once the piano is on its side (often the left front leg, but this depends on the piano’s orientation and plan).
- Unscrew or unbolt each leg one at a time, with someone holding the leg so it doesn’t drop or twist.
- Label each leg (front left, front right, back) for easier reassembly and to ensure each leg goes back in its original position.
- Wrap each leg in blankets or foam and keep all screws or bolts in labelled bags taped or tied to that leg.
Never try to tilt the piano fully while it’s still standing on its legs. The sideways stress can shear off leg joints in an instant.
7. Tilt the Piano Onto the Board
This is the most delicate part of the disassembly:
- With a coordinated team, slowly tilt the body of the piano onto its long side, directly onto the padded piano board.
- One person should be clearly in charge of calling out each move (“tilt slowly,” “hold,” “adjust grip,” “set down”).
- Move in small increments, pausing to adjust grips and check that the piano is aligning properly with the board.
- Ensure hands and feet are clear of pinch points where the case meets the board or the floor.
Once the piano is fully resting on the board, adjust the blankets and add more if needed to fill gaps and secure loose padding.
8. Strap and Secure the Piano to the Skid
Finally, make the entire package one stable unit:
- Run piano moving straps over and around the piano and skid, pulling them snug but not so tight that they crush the rim or compress delicate parts.
- Use multiple straps at different points along the length of the piano to prevent twisting or shifting.
- Double‑check that nothing moves when you gently rock the skid in different directions.
- Confirm that all removable parts (lyre, legs, music desk, hardware bags) are separately wrapped, labelled, and stored in a designated box or area.
Only when the piano is fully secured should you attempt to move it across the room or toward an exit.
Protecting People, the Piano, and the Property
Once the piano is on the skid, your focus shifts to safe travel from origin to van, and from van to destination. This stage is similar to transporting sensitive equipment in healthcare, IT, or manufacturing: it’s all about controlled motion and clear communication.
Planning and Communicating Each Move
Good planning and constant communication prevent surprises:
- Assign one person as the lead to give commands (lift, stop, turn, lower).
- Walk the entire route with the team before moving the piano, pointing out turns, door thresholds, and any changes in flooring.
- Identify narrow points, ramps, and potential hazards in advance – such as loose rugs, uneven tiles, or low‑hanging fixtures.
- Agree on clear verbal signals and ensure everyone understands when to speak up if something feels unsafe.
Everyone should know which side they’re on and what their role is at each stage. No one should move or lift without a clear signal from the leader.
Moving Across Floors, Thresholds, and Small Steps
For simple, flat moves:
- Set the skid on a piano moving dolly for level floors so the weight is carried by wheels, not by people.
- Use floor protection under the dolly path to avoid scratches, dents, or cracked tiles.
- Approach small thresholds or single steps with ramps; never “bump” the piano over obstacles, as that can create shocks and sudden weight shifts.
- Move slowly and steadily; avoid sudden starts, stops, or sharp turns that could destabilise the load.
Always keep the piano as upright and steady as possible, and avoid leaning it against walls or railings to “rest” along the way.
Stairs and Tight Corners
Stairs and sharp turns are where most DIY attempts go wrong:
- Even with experienced helpers, stairs dramatically increase risk because gravity can take over quickly.
- The load can become impossible to control if the piano starts to tilt or bounce, especially on narrow or steep steps.
- One misstep can injure movers or send the piano into a wall, railing, or down the staircase.
- Tight landings can require complex manoeuvres, including partially lifting and rotating the piano and skid in mid‑air.
If your route involves more than a couple of low, straight steps, you’re well into professional‑mover territory. In many cases, the right decision is to stop planning a DIY approach and bring in a team with proper stair‑handling ramps, winches, and training.
How Professional Piano Movers Handle Grand Pianos
Understanding professional methods can help you decide whether to hire them and what to expect when they arrive. Just as you’d want specialists to handle sensitive medical devices or archival collections, grand pianos benefit from teams who do this work every day.
Specialised Teams and Roles
Professional piano movers don’t improvise. They typically use:
- A trained crew accustomed to working together on pianos of different sizes and ages.
- Clear role assignments for each team member (lead, lift, balance, door management, spotter).
- Coordinated commands for lifting, tilting, and navigating difficult sections.
Their experience allows them to anticipate how the piano will behave in tight spaces or on stairs. They understand leverage, centre of gravity, and how to time each movement so the load never feels out of control.
Professional‑Grade Equipment
In addition to the basic gear mentioned earlier, pros often use:
- Custom‑sized piano boards for different grand sizes (baby grand, parlour grand, concert grand).
- Heavy‑duty, low‑profile dollies designed for high weight and stability, often with larger wheels for uneven surfaces.
- Steel or aluminium ramps for stairs, vans, and multi‑level entries, sometimes combined with winches or pulleys for better control.
- Specialised straps and harnesses for improved grip, control, and weight distribution across the team.
- Climate‑controlled vans or appropriate padding for moves where humidity or temperature swings could affect the instrument.
This equipment dramatically reduces the chance of injury or damage and allows them to handle complex environments – such as theatres, schools, recording studios, churches, and high‑rise apartments – with confidence.
Loading, Transporting, and Unloading
On moving day, professionals will:
- Disassemble (legs, lyre, etc.) and pad the piano as described, but with practised speed and consistency.
- Use ramps and controlled techniques to get the piano into the van without shocks or drops, often with one person dedicated to watching clearances.
- Secure the skid to the van walls or floor with multiple straps so it can’t shift in transit, even under sudden stops or sharp turns.
- Arrange the van so nothing heavy can fall onto the piano during transport.
- Reverse the process at the destination, navigating the new space carefully, reassembling the piano, and placing it exactly where you want it.
They also understand how to protect the piano from temperature swings, moisture, and vibration during longer trips, much like shipping artwork, scientific equipment, or high‑end electronics.
Costs: DIY Versus Professional Piano Movers
Price is often the main reason people consider moving a grand themselves. To make a smart decision, you need to compare real costs – not just the moving fee. This is similar to evaluating any major project: upfront savings can disappear once you factor in risk, time, and potential downside.
Direct and Indirect Costs of DIY
DIY moving may seem cheaper at first, but consider:
- Equipment rental or purchase: Skid, dollies, ramps, blankets, straps, floor protection, gloves, and corner guards.
- Potential medical costs: Doctor visits, physical therapy, or time off work if someone gets injured.
- Repair or replacement costs: If the piano, floors, walls, stairs, or doors are damaged, repair bills can easily exceed a professional moving fee.
- Lost time and stress: Planning, coordinating helpers, learning proper techniques, and problem‑solving on the fly all take time and mental energy.
- Tuning and regulation: Even a carefully moved grand often needs tuning after a relocation; a rough DIY move can increase the frequency or cost of post‑move service.
Once these are factored in, DIY may not be the “bargain” it appears to be – especially for high‑value instruments or challenging spaces.
What Professional Moves Typically Cost
The cost to move a grand piano varies based on:
- Piano size and weight: Baby grand vs. full‑size or concert grand.
- Distance: Within the same room, building, across town, or long‑distance.
- Access challenges: Stairs, tight corners, no elevator, steep driveways, or long carries from van to door.
- Geographic region and demand: Prices may be higher in major metropolitan areas.
- Insurance coverage and declared value: Higher declared value or additional coverage may increase the fee.
Local moves for a standard grand often cost far less than a major repair would if something goes wrong. For many owners – whether families, schools, houses of worship, music venues, or studios – that peace of mind is worth the fee and can be treated as part of the instrument’s long‑term care.
When DIY Stops Being Worth the Risk
Not every situation is suitable for DIY, even with good preparation. Knowing where to draw the line helps you protect both people and the instrument.
Red‑Flag Situations for DIY Moves
You should strongly consider hiring professional piano movers if:
- There are multiple flights of stairs or very steep steps.
- The path includes narrow or twisting staircases and landings.
- There are tight corners or doorways with almost no clearance.
- The piano must be moved in or out of a basement, loft, or upper‑story window.
- The piano is particularly valuable (financially or sentimentally), such as a concert instrument, heirloom, or rare model.
- You don’t have enough strong, reliable helpers who can follow directions and commit the necessary time.
- You feel uncertain at any stage of planning or disassembly, or you can’t visualise the route clearly.
- You are moving into a building with strict insurance or damage‑liability rules, such as a condo, co‑op, school, or performance hall.
In these scenarios, the likelihood of serious problems rises sharply. What looks “just barely possible” on paper can become unmanageable in real‑world conditions.
Safer Scenarios for Limited DIY
There are some cases where a partial DIY approach can be reasonable:
- Short, level moves within a single large room or across a flat floor with wide doorways and no steps.
- Preparing the piano (clearing the path, basic disassembly under guidance) and then having pros handle stairs, loading, transport, and reassembly.
- Assisting professional movers under their direction to reduce time and cost while leaving the high‑risk manoeuvres to them.
- Moving an older, low‑value practice instrument on a single level where minor cosmetic damage is acceptable, though safety must still come first.
Even then, you should only proceed if you’re fully equipped, have a clear plan, and are willing to stop and call professionals if anything feels unsafe.
Choosing the Right Professional Piano Movers
If you decide to hire pros, selecting the right company matters as much as the decision to hire. The right team treats your piano like a precision instrument, not just another piece of furniture.
Look for Specialised Piano Moving Expertise
Not all moving companies are equal when it comes to pianos. Prioritize:
- Dedicated piano moving companies or movers who clearly specialise in grand pianos.
- Strong, recent reviews mentioning successful grand piano moves, specific models, and challenging spaces similar to yours.
- Evidence of specialised equipment (piano boards, ramps, dollies) in their photos or descriptions.
- Clear policies around insurance, valuation, and damage claims in writing.
- Experience with your environment, such as high‑rise buildings, schools, recording studios, theatres, churches, or institutional settings.
Avoid general movers who treat pianos like oversized furniture or who seem vague about how they handle grands specifically.
Key Questions to Ask Before You Hire
To vet a potential mover, ask:
- How many grand pianos do you move each month?
- What specific equipment do you use for grand piano moves?
- Is disassembly and reassembly included in the quoted price?
- How do you handle stairs, tight turns, or long carries from the van to the doorway?
- What insurance coverage do you provide, and how do damage claims work?
- Are there extra fees for stairs, difficult access, limited parking, or distance from van to entrance?
- Are your movers employees or subcontractors, and how are they trained for piano work?
Their answers will tell you a lot about their experience and professionalism. A good company will be transparent, patient with your questions, and able to describe their process in clear, specific terms.
Conclusion
Grand piano moving is complex because it combines heavy, unbalanced weight with fragile components and high financial and emotional value. While it’s possible to handle basic preparation or simple, flat moves with the right tools and strong helpers, the risks of injury, instrument damage, and property damage rise quickly with stairs, tight spaces, and longer distances.
By recognising what makes grands so challenging to move, equipping yourself properly, and following a careful disassembly and protection process, you can better judge what’s reasonable to do yourself. Just as importantly, you can see where DIY stops being worth the risk and where expert help becomes the safest, most economical option.
Looking ahead, treating your grand piano like the precision instrument it is – during moves as well as during tuning, regulation, and climate control – will extend its life and preserve its tone. Whether you’re rearranging a living room, relocating a school music program, outfitting a studio, or moving a performance instrument between venues, the key is to plan deliberately, respect the physics involved, and lean on specialised professionals when the situation demands it.
When in doubt, investing in experienced professional piano movers – especially those who specialise in grands – is often the most cost‑effective decision. Their expertise, equipment, and insurance help ensure your piano arrives safely at its new home, ready to be tuned, voiced, and played for years to come.